Adding Controls
The order in which you add controls to the form is the order in which they will be selected by clicking the Tab key at runtime. If you want to change the tabbing order you will need to delete and re-add controls in the required order.
If you have previously used ATS Inspect Layout Manager you will notice that there are no control groups here. In Form Composer they are not required and you can insert controls directly into the forms.
When you create or open a form the toolbox will update to display only those controls that are available for that particular form type.
Add controls to the form as follows:
In the toolbox select the Form Specific or Other tab.
If you select the Other tab then select the control type from the drop-down list at the top of the toolbox.
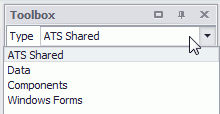
Click and drag the control you want to use from the toolbox to the form.
The control will appear in the form and the name of the control in the toolbox will be faded out to show that it is unavailable.
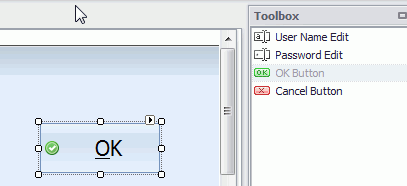
-
The name of the control must not start with a number as it may cause issues.
Arranging Controls
Once you have more than one control you may wish to arrange them. There are several buttons available in the Layout section of the Ribbon that will allow you to do this.

The following buttons are available:
|
Icon |
Description |
|
|
Align left side of the selected objects. |
|
|
Center the selected objects horizontally. |
|
|
Align right side of the selected objects. |
|
|
Align the top of the selected objects. |
|
|
Center the selected objects vertically. |
|
|
Align the bottom of the selected objects. |
|
|
Make horizontal spacing equal. |
|
|
Increase horizontal spacing. |
|
|
Decrease horizontal spacing. |
|
|
Make vertical spacing equal. |
|
|
Increase vertical spacing. |
|
|
Decrease vertical spacing. |
|
|
Bring the selected object to the foreground. |
|
|
Send the selected object to the background. |
The actions taken are dependant upon the first control to be selected in the group. For example, if you select three controls and align their right sides, they will align to the right side of the first control selected.
Modifying Controls
The name of a control must not start with a number as it may cause issues.
The look and feel of controls, as well as the way the operator interacts with them, can be modified in two different ways.
Smart Tag
On most controls you can access a list of the most important properties using the adornment control.
Select a control.
Click the Smart Tag.

Modify the properties.
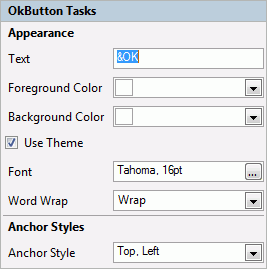
Click anywhere outside the properties form to close it.
Properties Element
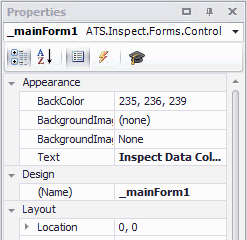
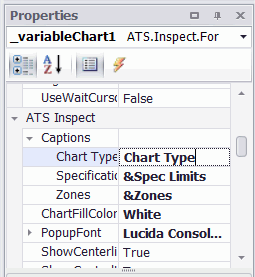
When you select a component the Properties element updates to display all the properties for it.
To switch between the simplified list and the extended list click the Enable Expert Mode button ( ).
).
Translating Control Captions
Control captions can be translated by modifying the Captions fields within the properties of the control.
Using the Format Painter
The Format Painter allows you to copy the formatting of one control to another.
Select a control and click Format Painter in the Forms tab.
A red box appears around the control.

Click on the control you want to copy the format to. Hold the Ctrl key to select multiple controls.
The color and text format is copied to the control.
Anchoring Controls
Control anchoring allows you to lock the position of a control or automatically resize it when a form is resized.
Select the smart tag in the top-right corner of the control.
Open the Anchor Style drop-down.
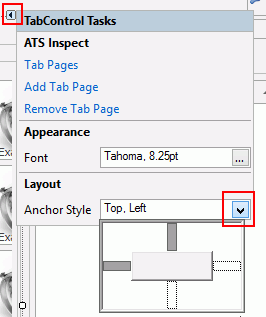
Enable the sides that you want to lock in place. In the example above the top and left sides are locked in place. If you want the control to expand with the form enable all four sides.
The control expands in relation to its parent control.